Verifying the Certificate Mapping for Smart Card Logon
Determine the mapping type
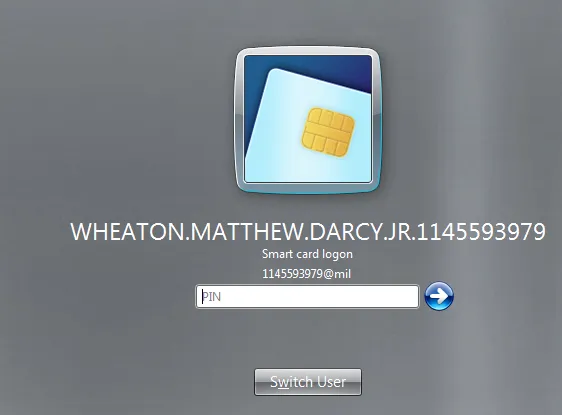
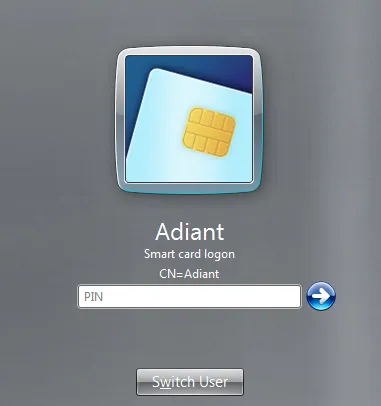
On the logon screen, look at the account hint shown below "Smart card logon":
| Hint format | Mapping type |
|---|---|
Contains @ — e.g. 1145593979@mil |
UPN mapping |
Contains = — e.g. CN=John Doe,DC=corp,DC=com |
Explicit mapping |
UPN mapping
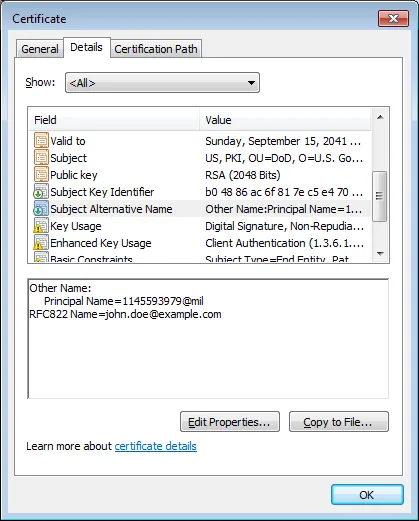
Step 1 — Find the UPN in the certificate
- Open the certificate properties and go to the Details tab.
- Look for Subject Alternative Name.
- At the bottom, find Principal Name (e.g.
1145593979@mil). There may also be an RFC822 Name.
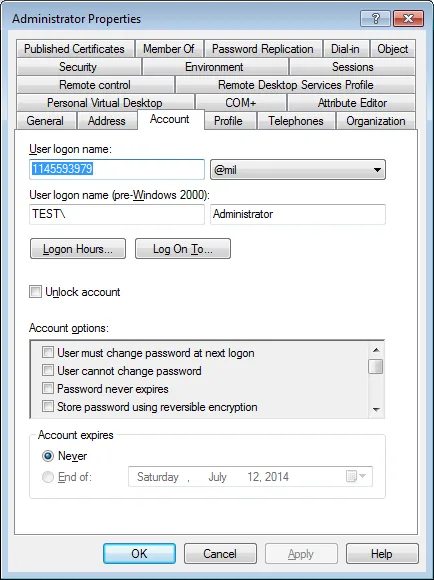
Step 2 — Verify the user account UPN in Active Directory
- Open Active Directory Users and Computers.
- Open the user's properties and verify the User logon name (UPN) matches the Principal Name from the certificate.
Step 3 — Correct the UPN if needed
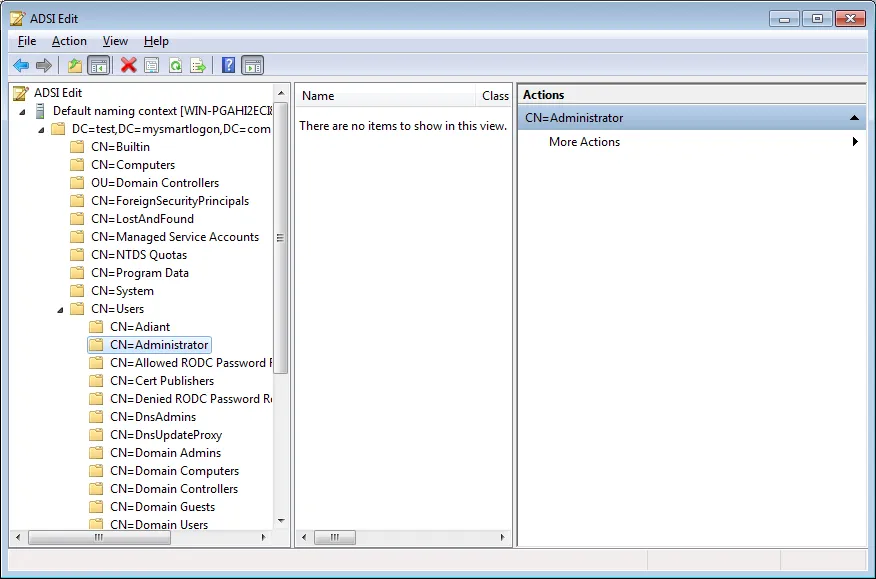
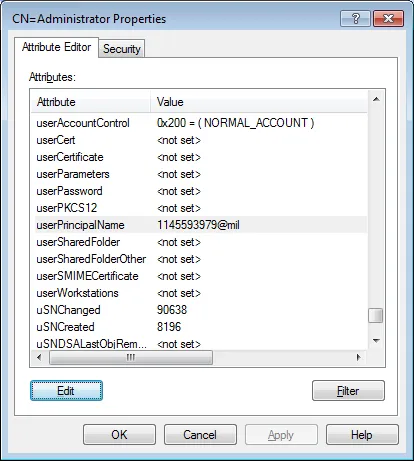
If the suffix (e.g. @mil) cannot be changed via the standard UI, use ADSI Edit to directly edit the userPrincipalName attribute.
Explicit mapping
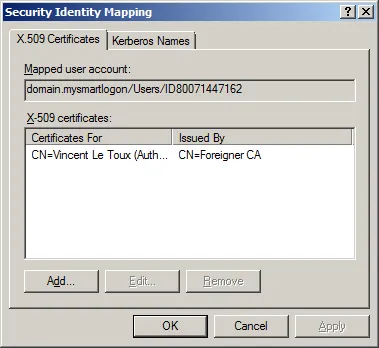
Explicit mapping stores the certificate identity in the altSecurityIdentities attribute of the user object.
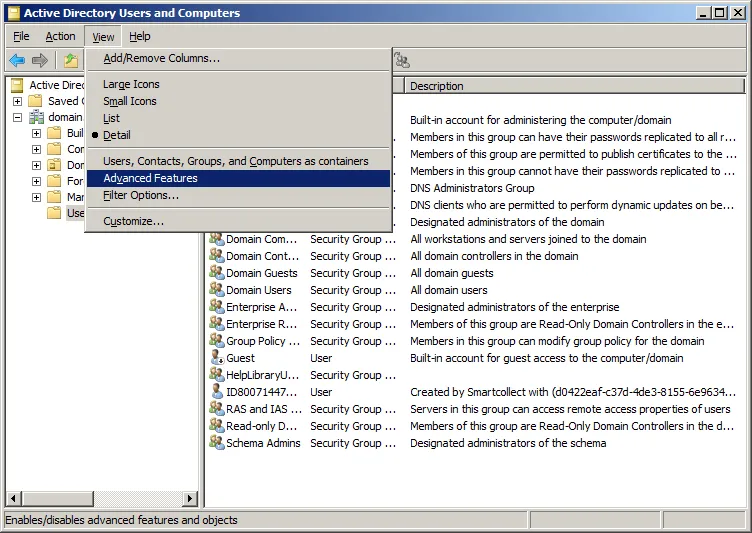
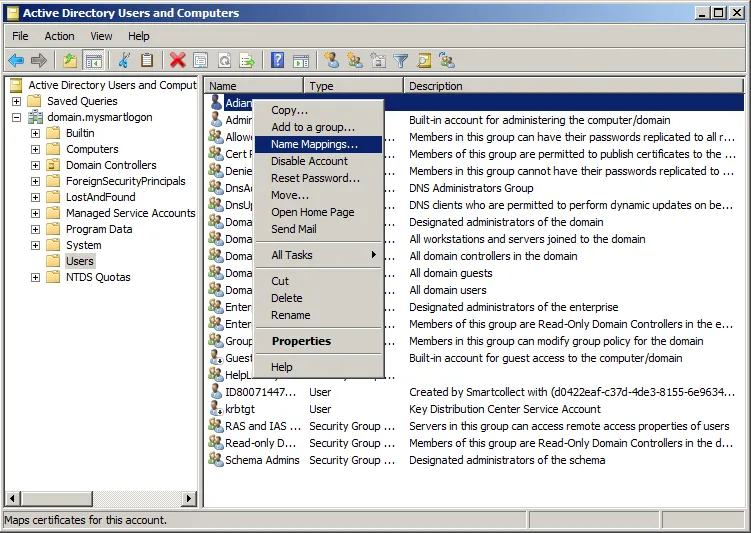
Step 1 — Enable Advanced Features
In Active Directory Users and Computers, go to View → Advanced Features.
Step 2 — Open Name Mappings
- Select the user account.
- Right-click → Name Mappings.
- Select the smart card certificate and validate.
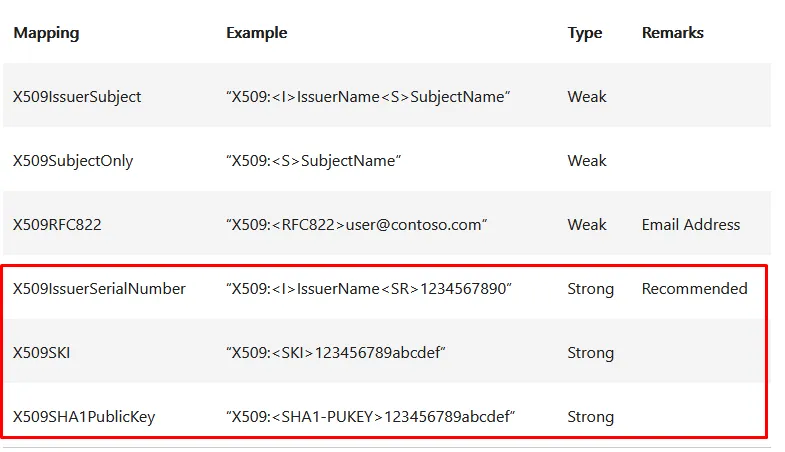
Available mapping formats
| Format | Description |
|---|---|
X509:<I>issuer<S>subject | Issuer + Subject (most common) |
X509:<S>subject | Subject only |
X509:<I>issuer<SR>serialnumber | Issuer + Serial (bytes reversed) |
X509:<SKI>ski | Subject Key Identifier |
X509:<SHA1-PUKEY>hash | SHA-1 hash of the public key |
X509:<RFC822>email | RFC 822 email address from SAN |
Warning — Serial number byte order: When using
<SR> mapping, the serial number bytes are written in reverse order compared to what the certificate viewer shows.
Warning — Do not combine mapping formats: Do not combine types in a single value (e.g.
X509:<I>xxx<S>xxx<SR>xxx). The mapping will silently fail.